Is your Honda Civic’s check engine light glowing and causing you stress? You’re not alone.
That little warning can feel overwhelming, but you don’t have to panic. You’ll discover simple, clear steps to remove the check engine light and get your car back to normal. Whether you want to fix it yourself or understand what’s going on, this guide is made just for you.
Keep reading to take control of your car and drive with confidence again.
Credit: www.civic11forum.com
Common Causes For Check Engine Light
The check engine light in your Honda Civic can turn on for various reasons. Understanding the common causes helps you decide whether it's a simple fix or if professional help is needed. Ignoring the light might lead to bigger problems down the road.
Loose Or Faulty Gas Cap
A loose or damaged gas cap is a surprisingly common cause for the check engine light. It can cause fuel vapors to leak, triggering the warning. Tightening the cap or replacing it often clears the light quickly.
Oxygen Sensor Issues
Your Civic’s oxygen sensor monitors the air-fuel mixture in the engine. If it malfunctions, it can affect fuel efficiency and emissions. Replacing a faulty sensor usually restores your car’s performance and turns off the light.
Faulty Spark Plugs
Spark plugs ignite the fuel-air mixture inside the engine cylinders. Worn or damaged plugs can cause misfires, leading to rough engine running and the check engine light coming on. Swapping them out can improve engine smoothness and fuel economy.
Mass Airflow Sensor Problems
The mass airflow sensor tells your engine how much air is entering the system. A dirty or failing sensor can cause poor engine performance and trigger the warning light. Cleaning or replacing it can solve these issues effectively.
Catalytic Converter Concerns
The catalytic converter reduces harmful emissions from your Civic. Problems here often cause a drop in fuel efficiency and power. If the light stays on after other fixes, checking the catalytic converter is a smart next step.
Tools Needed For Diy Fixes
Before you tackle the check engine light on your Honda Civic, gathering the right tools is key. Having everything at hand not only speeds up the process but also reduces frustration. Whether you’re a beginner or have some experience, these tools will make your DIY fix smoother and safer.
Obd-ii Scanner
An OBD-II scanner is your best friend for diagnosing the exact reason behind the check engine light. This device plugs into your car’s diagnostic port and reads error codes, giving you a clear picture of what’s wrong.
Many models are affordable and easy to use. Some even connect to your smartphone, displaying codes with simple explanations. Do you want to guess the problem or know it for sure?
Basic Hand Tools
Having a set of basic hand tools is essential for most repairs. This usually includes screwdrivers, pliers, socket wrenches, and a ratchet set. These tools help you remove or tighten parts like air filters, spark plugs, or sensors that might trigger the light.
Think about the last time you fixed something without the right screwdriver—frustrating, right? Avoid that by prepping your toolbox beforehand.
Replacement Parts
Once you’ve identified the faulty component, you’ll need the right replacement parts. Common culprits behind the check engine light include oxygen sensors, spark plugs, and air filters. Having these parts ready saves you from multiple trips to the store.
Always check your Honda Civic’s model year and engine type to get compatible parts. Why waste time with parts that don’t fit?
Safety Equipment
Never overlook safety when working on your car. Gloves protect your hands from cuts and chemicals, while safety glasses shield your eyes from debris. A fire extinguisher nearby is also a smart precaution when dealing with electrical components or fuel lines.
Wearing the right gear keeps you safe and confident during the repair. Would you rather risk injury or be fully prepared?
Using An Obd-ii Scanner
An OBD-II scanner reads your Honda Civic’s engine codes to find problems causing the check engine light. Clearing these codes with the scanner can turn the light off quickly and safely. This tool helps you avoid unnecessary trips to the mechanic.
Using an OBD-II Scanner to remove the check engine light on your Honda Civic is a straightforward and effective method. This handy device can read and clear error codes, helping you identify issues quickly. By addressing the problem directly, you can ensure your car remains in optimal condition.
Locating The Port
The first step is finding the OBD-II port in your Honda Civic. Typically, this port is located under the dashboard, on the driver's side, near the steering column. It might be a little tucked away, so using a flashlight can help you spot it easily. Once you locate the port, you’ll feel more confident about using the scanner. It’s like finding the key to unlock vital information about your car’s health. Have you ever thought about how much information is hidden right under your dashboard?
Reading Error Codes
After plugging in the OBD-II scanner, turn the ignition to the "on" position without starting the engine. The scanner will power up and prompt you to read the error codes. These codes are your car’s way of communicating specific problems. Consider the scanner as your personal mechanic, delivering insights at the push of a button. Error codes might seem like a jumble of numbers and letters, but they’re crucial in diagnosing issues. What if knowing these codes could save you a costly trip to the mechanic?
Clearing The Check Engine Light
Once you’ve identified and addressed the root cause of the problem, it’s time to clear the check engine light. Most OBD-II scanners have a “clear” or “erase” function to reset the light. After clearing, the light should turn off, indicating the issue has been resolved. Feel the satisfaction of solving a problem on your own. Imagine the peace of mind knowing your Honda Civic is running smoothly again. Isn’t it empowering to have control over your car’s maintenance right at your fingertips?
Simple Fixes To Try First
Seeing the check engine light on your Honda Civic can feel worrying. Many issues are simple to fix. Trying easy solutions first saves time and money. These fixes often clear the light fast. You can do them without special tools or skills.
Tightening The Gas Cap
A loose gas cap often triggers the check engine light. Gas fumes may leak, causing the sensor to alert. Turn off the engine and open the gas tank door. Remove the cap and twist it firmly until it clicks. Drive for a short distance to see if the light goes off.
Replacing Spark Plugs
Worn or dirty spark plugs can cause engine misfires. This problem triggers the check engine light. Check your vehicle’s manual for the spark plug type. Carefully remove old plugs and replace them with new ones. New spark plugs improve engine performance and may turn off the warning light.
Cleaning The Mass Airflow Sensor
The mass airflow sensor measures air entering the engine. Dirt can block it, causing wrong data and lighting the engine warning. Locate the sensor near the air filter box. Use a special cleaner to spray and gently wipe the sensor. Avoid touching sensor wires directly. Let it dry before starting the engine again.
When To Replace Parts
Knowing when to replace parts in your Honda Civic helps fix the check engine light quickly. Replacing worn or faulty parts stops damage and keeps your car safe. Watch for clear signs to decide if a part needs changing.
Signs Of A Bad Oxygen Sensor
- Poor fuel economy despite normal driving habits
- Rough engine idle or frequent stalling
- Engine hesitation or loss of power
- Check engine light stays on after repair attempts
Catalytic Converter Replacement Indicators
- Strong sulfur or rotten egg smell from exhaust
- Engine struggles to accelerate or loses power
- Failed emissions test with high harmful gases
- Check engine light flashing or solid on
Spark Plug Wear And Tear
- Engine misfires or rough starts
- Increased fuel consumption
- Difficulty accelerating or poor engine response
- Visible damage or carbon buildup on spark plugs
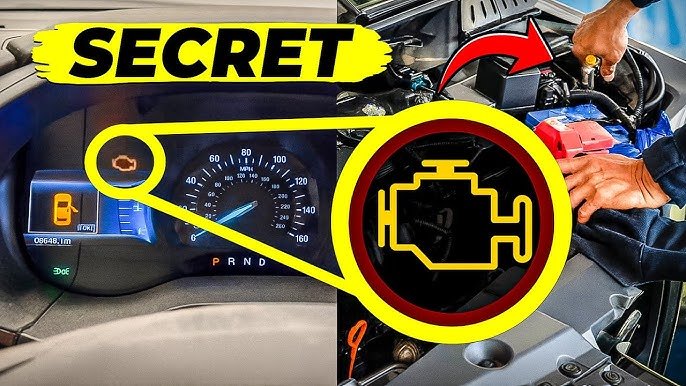
Credit: www.civic11forum.com
Resetting The Check Engine Light Manually
Resetting the check engine light manually on your Honda Civic can save you a trip to the mechanic and give you more control over your vehicle’s maintenance. It’s a straightforward process if you understand the right steps. Let’s look at how you can clear that light safely and effectively.
Disconnecting The Battery
One simple way to reset the check engine light is by disconnecting your car’s battery. This cuts power to the vehicle’s computer and clears temporary error codes.
Here’s what you need to do:
- Turn off your Honda Civic and open the hood.
- Use a wrench to disconnect the negative battery cable first, then the positive.
- Wait for about 15 minutes to ensure the system resets.
- Reconnect the cables, positive first, then negative.
Keep in mind, disconnecting the battery will reset all electronic systems, including your clock and radio presets. Have you noticed how this method sometimes doesn’t work if the underlying issue is still present?
Using The Obd-ii Scanner Reset Function
An OBD-II scanner is a handy tool that connects to your Civic’s diagnostic port to read and clear error codes. This method is more precise than disconnecting the battery because it targets the check engine light specifically.
To use it:
- Plug the scanner into the port under the dashboard.
- Turn on your ignition without starting the engine.
- Follow the scanner’s menu to read codes and select the option to clear them.
If you don’t own a scanner, many auto parts stores offer free scanning. Have you ever wondered why your check engine light comes back after clearing it with a scanner? Usually, it means the problem hasn’t been fixed.
Driving Cycle To Clear Codes
Sometimes, the check engine light resets itself after a few driving cycles. This happens when your vehicle’s computer runs tests and finds no ongoing issues.
To encourage this reset:
- Drive your Civic normally, including highway speeds if possible.
- Complete at least one full cycle of starting, running, and shutting off the engine.
- Make sure to drive for about 30 minutes without turning off the engine abruptly.
This method requires patience but avoids any manual intervention. Have you noticed how some minor issues clear themselves after a few drives, while others persist and demand attention?
Preventive Maintenance Tips
Keeping your Honda Civic’s check engine light off starts with good habits. Preventive maintenance helps you avoid sudden issues and saves money on repairs. A few simple routines can keep your engine running smoothly and your dashboard clear.
Regular Engine Checks
Make it a habit to check your engine regularly. Look for leaks, strange noises, or unusual smells. Even a quick visual inspection can catch problems before they trigger the check engine light.
Pay attention to your dashboard gauges and warning lights daily. If you notice anything odd, don’t ignore it. Early detection often means a quick and inexpensive fix.
Scheduled Part Replacements
Your Honda Civic’s manual lists when to replace parts like spark plugs, air filters, and timing belts. Sticking to this schedule prevents wear that could cause engine trouble.
Replacing worn parts on time keeps your engine running efficiently. It also reduces emissions and improves fuel economy. Have you checked your service records lately to make sure you’re on track?
Fuel Quality And Usage
The fuel you put in your tank affects your engine’s health. Using low-quality fuel can cause deposits and sensor problems, which may light up the engine warning.
Choose reputable gas stations and avoid fueling up with cheap, questionable gasoline. Also, try to keep your tank at least a quarter full to prevent fuel pump issues. How often do you pay attention to where and how you fill your tank?
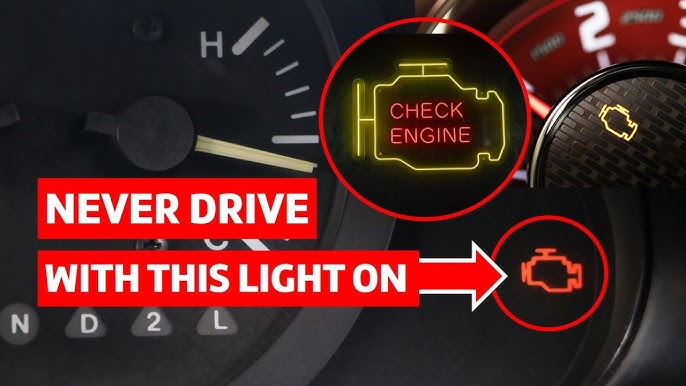
Credit: www.youtube.com
Frequently Asked Questions
How Do I Reset The Check Engine Light On A Honda Civic?
You can reset the check engine light by using an OBD-II scanner. Connect it to your car’s port, read the codes, and clear them. Alternatively, disconnect the battery for 15 minutes to reset the system. Always fix the underlying issue before resetting.
What Causes The Check Engine Light In Honda Civic?
Common causes include faulty oxygen sensors, loose gas caps, or bad spark plugs. Engine misfires and emissions problems also trigger the light. Regular maintenance helps prevent these issues and keeps your Honda Civic running smoothly.
Can I Drive My Honda Civic With The Check Engine Light On?
Driving with the check engine light on is possible but risky. It depends on the issue severity. If the light is steady, drive cautiously and get a diagnostic test. If flashing, stop immediately and seek professional help.
How Often Should I Check The Engine Light On My Honda Civic?
Check the engine light as soon as it appears. Regularly scan your vehicle during routine maintenance, especially if the light comes on. Early diagnosis prevents severe damage and costly repairs.
Conclusion
Removing the check engine light on your Honda Civic is easier than you think. Start by reading the error code with a scanner. Fix the problem based on the code’s advice. Clear the code to turn off the light. Keep your car maintained to avoid future issues.
Small steps help your car run smoothly and safely. Stay calm and follow these tips for a trouble-free drive. Your Honda Civic will thank you.