Is your car having trouble starting, or do you notice a weak connection under the hood? The problem might be your battery terminal.
Knowing how to replace a car battery terminal can save you time, money, and the hassle of unexpected breakdowns. In this guide, you’ll learn simple, step-by-step instructions to fix the issue yourself—no mechanic needed. Ready to take control and keep your car running smoothly?
Let’s dive in and get your battery back in top shape.
Tools And Materials Needed
Having the right tools and materials on hand makes replacing a car battery terminal much easier and safer. Without them, you might find yourself stuck or risking damage to your vehicle. Let’s look at what you’ll need to get the job done efficiently.
Essential Tools For The Job
- Wrench or Socket Set:Most battery terminals use nuts that need a 10mm wrench or socket. Having the correct size avoids stripping the nuts.
- Wire Brush:This helps clean corrosion from terminals and connectors, ensuring a solid electrical connection.
- Screwdriver:Some terminals have screws that need loosening or tightening.
- Pliers:Useful for gripping and bending wires as needed during replacement.
- Battery Terminal Puller (Optional):If terminals are stuck, this tool can help remove them without damage.
Materials You Should Gather
- Replacement Battery Terminals:Make sure these match your battery posts for a snug fit.
- Dielectric Grease:Applying this after cleaning prevents future corrosion.
- Rags or Paper Towels:Useful for wiping away grime and drying components.
- Protective Gloves:Batteries can leak acid, so gloves protect your hands.
- Safety Glasses:Eye protection is critical when working with battery acid or sparks.
Why Not Use Makeshift Tools?
I once tried using a random wrench that was slightly too big. It stripped the nut, making removal much harder and adding extra time to the job. Using the right tools from the start saves frustration and potential damage.
What tools do you already have in your garage? Gathering everything beforehand avoids interruptions and keeps you focused on the task. Ready your workspace and gear up for a smooth battery terminal replacement.
Safety Precautions
Handling a car battery terminal demands careful attention to safety. Batteries contain acid and store electrical energy that can cause serious harm if mishandled. Before you start, understanding key safety precautions can protect you from injury and prevent damage to your vehicle.
Wear Protective Gear
Always wear safety glasses and gloves before touching the battery. Acid splashes can cause burns or eye damage, and gloves protect your skin from corrosive substances. I once skipped gloves and ended up with a painful rash—don’t make the same mistake.
Work In A Well-ventilated Area
Batteries release hydrogen gas, which is flammable. Make sure you work outdoors or in a garage with open doors and windows. Avoid sparks or flames nearby to prevent explosions.
Disconnect The Negative Terminal First
Removing the negative terminal first reduces the risk of short circuits. It’s easy to accidentally touch metal parts with the wrench and create sparks if you don’t follow this order. Think about it as cutting off the power source before disconnecting other connections.
Keep Metal Objects Away
Never place tools or jewelry on the battery. A dropped wrench can cause a short circuit if it bridges the terminals. I once saw a ring melt because it touched the battery—protect your valuables and your safety by keeping metal away.
Check For Battery Damage
Inspect the battery for cracks or leaks before handling it. A damaged battery can leak acid or even explode. If you notice any damage, replace the battery rather than trying to repair the terminals.
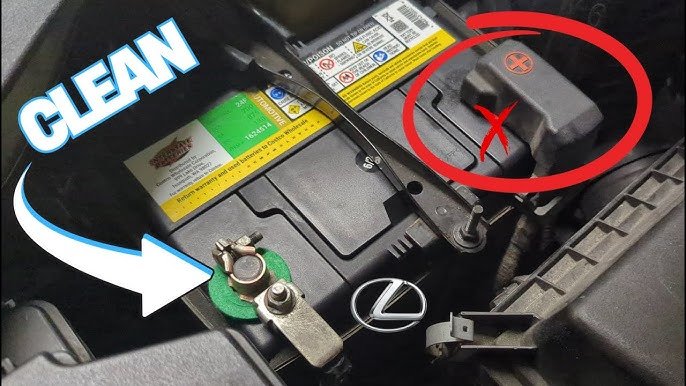
Identifying Battery Terminals
Battery terminals connect the car battery to the vehicle’s electrical system. Identifying the positive terminal, marked with a plus (+), and the negative terminal, marked with a minus (-), is essential before replacement. Correct identification ensures safe and proper installation.
Identifying battery terminals is a crucial step when you're about to replace a car battery terminal. Understanding which terminal is which can prevent mishaps and ensure a smooth battery replacement process. Imagine getting this wrong—your car might not start, or worse, you could damage the battery or electrical system.
Understanding The Positive And Negative Terminals
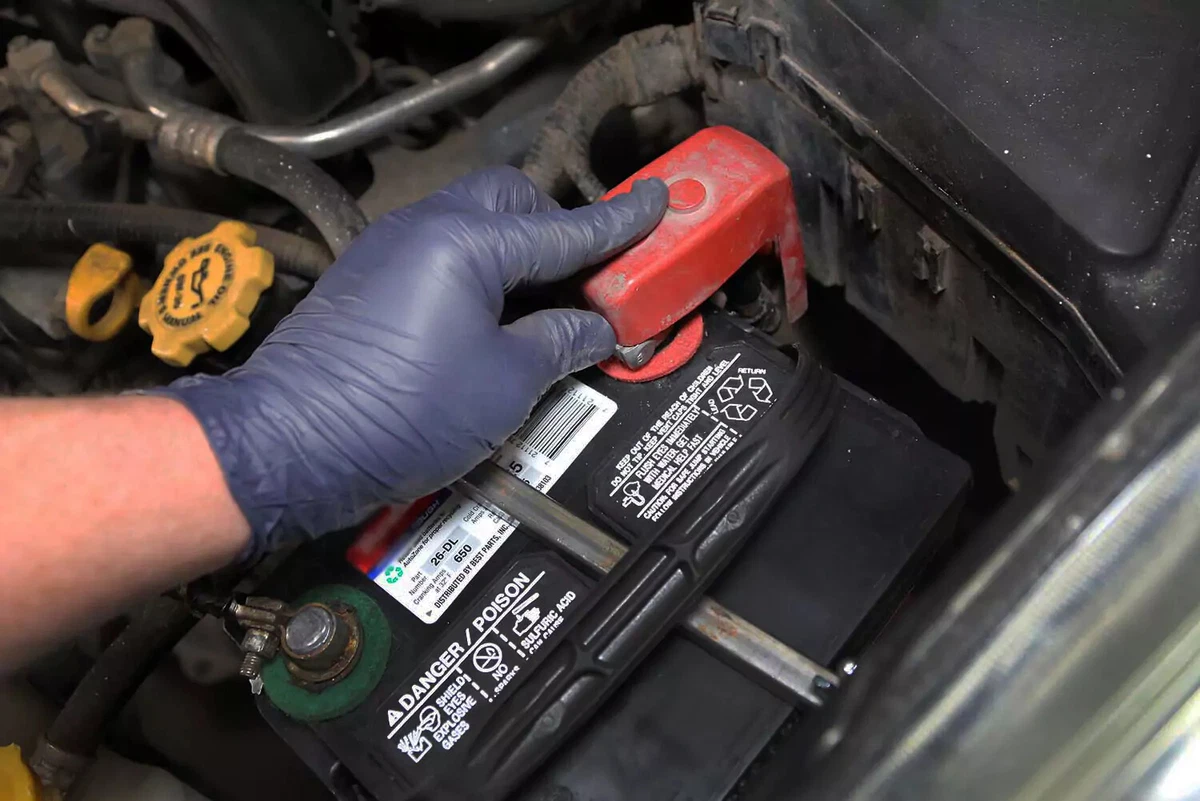
The first thing you'll notice about battery terminals is that they're usually marked with a plus (+) and minus (-) sign. The positive terminal often has a red cover or cable, while the negative is black. This color coding helps in quickly identifying the terminals, reducing the chances of mistakes.
Locating The Terminals
Open your car's hood and locate the battery. The terminals are typically positioned on the top of the battery. Some batteries have side terminals, so be sure to check the sides if you don't see them on top.
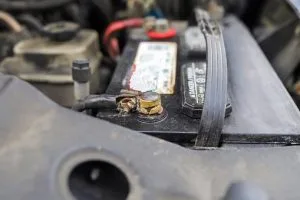
Inspecting Terminal Condition
Before replacing, inspect the current terminals. Are they corroded or damaged? Corrosion can appear as a white, ashy substance around the terminal. If you see this, it’s time for a replacement.
Using Terminal Markings
Some batteries come with additional markings for clarity. Look for a "P" or "POS" for positive, and "N" or "NEG" for negative. These markings can be a lifesaver if the color coding isn’t visible.
Testing Terminal Tightness
Loose terminals can cause starting issues. Give each terminal a slight wiggle to check for tightness. If they move easily, they might need tightening or replacement. Identifying battery terminals might seem trivial, but it's a vital skill for any car owner. Getting it right can save you from a lot of hassle down the road. Have you ever misidentified a terminal? What was your experience? Share your thoughts in the comments below!
Credit: baterihub.com
Removing The Old Terminal
Removing the old battery terminal is a crucial step before installing a new one. It requires careful handling to avoid damage to your car’s electrical system. Taking your time here can save you from unexpected hassles later on.
Disconnecting The Negative Terminal
Start by locating the negative terminal, usually marked with a minus (-) sign or black color. Use a wrench to loosen the nut on the clamp and gently wiggle the terminal off the battery post. This step is key because disconnecting the negative terminal first reduces the risk of short circuits while you work.
Removing The Positive Terminal
Next, move to the positive terminal, marked with a plus (+) sign or red color. Use the wrench to loosen the nut just like before and carefully lift the terminal off. Be mindful not to let your wrench touch any metal parts of the car body during this process to prevent sparks.
Cleaning The Battery Post
Once the terminals are off, check the battery posts for corrosion or dirt. Use a wire brush or battery post cleaner to scrub away any buildup. Cleaning here ensures a better connection for your new terminal and helps your car start smoothly.
Choosing The Right Replacement Terminal
Choosing the right replacement terminal for your car battery is crucial to ensure a secure connection and long-lasting performance. Using an incompatible terminal can lead to poor contact, corrosion, or even electrical failure. Let’s look at how you can pick the perfect fit for your vehicle and avoid common mistakes.
Understanding Terminal Types And Sizes
Battery terminals come in various shapes and sizes, including top post, side post, and L-shaped designs. Each vehicle model typically requires a specific type, so matching the terminal to your car’s original setup is key.
Check your battery or vehicle manual for the exact terminal style and size. You might find terminals labeled as SAE or JIS, indicating the standard they follow. Using the wrong size can cause loose connections or damage to the battery post.
Material Matters: Lead Vs. Brass Vs. Copper
Terminals are usually made from lead, brass, or copper. Lead terminals are common because they resist corrosion and are cost-effective. However, copper terminals offer better conductivity but can corrode faster if not treated properly.
Think about your local weather conditions and how often you maintain your car. If you don’t check your battery terminals frequently, lead might be a safer choice. But if performance is your priority and you’re willing to maintain them, copper could give you a slight edge.
Features To Look For In A Quality Terminal
Look for terminals that have anti-corrosion coatings or built-in clamps that ensure a tight fit. Some come with additional features like quick-release levers, which make future battery changes easier.
Ask yourself how often you plan to replace or service your battery. A terminal with extra features might cost a bit more but save you time and frustration later. Always check for secure fastening options to avoid loose connections that can cause starting problems.
Compatibility With Your Car’s Electrical System
Your car’s electrical system voltage and current requirements should guide your choice of terminal. High-performance or heavy-duty vehicles may need terminals designed to handle higher amperage.
Ignoring this detail can lead to overheating or even electrical shorts. If your vehicle has additional accessories or modifications, consider terminals rated for higher loads to avoid surprises down the road.
Where To Buy Reliable Replacement Terminals
Buy replacement terminals from trusted auto parts stores or online retailers with good reviews. Avoid cheap, unbranded parts as they often sacrifice quality and durability.
Sometimes, local mechanics or battery specialists can recommend or supply the right terminals based on their experience with your vehicle model. Investing in quality parts upfront can save you from costly repairs later.

Credit: www.youtube.com
Installing The New Terminal
Installing the new battery terminal requires careful handling to ensure a secure and reliable connection. Each terminal must fit snugly on the battery posts. Proper installation prevents electrical issues and extends battery life.
Attaching The Positive Terminal
Locate the positive battery post, usually marked with a plus sign (+) or red color. Slide the new positive terminal over the post. Make sure it fits tightly. Loose connections can cause starting problems or electrical faults.
Attaching The Negative Terminal
Find the negative battery post, marked with a minus sign (−) or black color. Place the new negative terminal onto the post firmly. Check that it does not move easily. A solid connection is vital for the car's grounding system.
Securing The Connections
Use a wrench to tighten the terminal clamps. Do not overtighten, as it may damage the terminal or battery post. Check both terminals by gently wiggling them. No movement means the connection is secure and ready for use.
Testing The New Terminal
Testing the new car battery terminal is a crucial step after replacement. It ensures that your connection is secure and your vehicle will start reliably. Skipping this step can lead to unexpected breakdowns or electrical issues.
Visual Inspection For Proper Fit
Begin by closely examining the new terminal’s fit on the battery post. It should sit firmly without any wiggle or looseness.
Look for any gaps or corrosion that might have been missed during installation. A tight and clean fit is key to maintaining a good electrical connection.
Using A Multimeter To Check Voltage
Grab a multimeter to measure the voltage at the terminal. Set it to DC volts and touch the probes to the terminal and the battery’s negative side.
You should see a reading close to your battery’s rated voltage, usually around 12.6 volts for a fully charged battery. Any significant drop indicates a poor connection or a faulty terminal.
Testing For Voltage Drop Under Load
Simply measuring voltage is not enough; check how the terminal performs under load. Turn on your headlights or start the car while measuring voltage at the terminal.
If the voltage drops significantly, the terminal might not be conducting electricity efficiently. This test reveals hidden resistance that can affect your car’s performance.
Ensuring Tightness And Security
Double-check the terminal clamp for tightness after testing. Use a wrench to make sure it’s snug but avoid over-tightening, which can damage the terminal or battery post.
Try gently moving the terminal to confirm it won’t shift with engine vibrations. A secure connection prevents electrical interruptions while driving.
Final Functional Test
Start your car and observe the electrical systems. Check if the dashboard lights, radio, and lights operate smoothly without flickering.
Any hesitation or dimming can signal an issue with the terminal installation. If everything runs perfectly, your replacement was successful.
Credit: www.ebay.com
Tips For Maintaining Battery Terminals
Keeping your car's battery terminals in good shape is key to avoiding unexpected breakdowns. Clean and well-maintained terminals ensure a strong connection between your battery and vehicle. This helps your car start smoothly every time and extends the life of your battery.
Keep Terminals Clean And Dry
Dirt and moisture cause corrosion, which can weaken the battery connection. Use a wire brush or battery terminal cleaner to scrub off any buildup. After cleaning, wipe the terminals dry with a cloth to stop moisture from causing damage.
Apply Protective Coating
After cleaning, add a layer of petroleum jelly or a commercial anti-corrosion spray on the terminals. This creates a barrier against moisture and air, which helps prevent rust. Have you tried this? It often saves a lot of hassle later.
Check For Loose Connections
Loose terminals can cause your car to stall or fail to start. Make sure the clamps fit snugly on the battery posts. If you notice any movement, tighten them with a wrench until they are secure but avoid overtightening to prevent damage.
Inspect Terminals Regularly
Make it a habit to look at your battery terminals every few months. Early signs of corrosion or wear can be addressed quickly before they cause bigger problems. Don’t wait until your car won’t start to check this simple part of your vehicle.
Replace Damaged Terminals Promptly
If terminals are cracked or heavily corroded, replacing them is the best option. Continuing to use damaged terminals can lead to poor electrical contact and battery failure. Keeping spares or knowing where to get replacements can save you time and stress.
Frequently Asked Questions
How Do I Know When To Replace Car Battery Terminals?
Replace terminals if they are corroded, cracked, or loose. Damaged terminals affect battery performance and can cause starting issues. Regular inspection helps maintain a reliable connection and prevents electrical problems.
What Tools Are Needed To Replace Battery Terminals?
You need a wrench or pliers, a wire brush, and new battery terminals. Safety gloves and eye protection are also recommended. These tools help ensure a safe and efficient terminal replacement process.
Can I Replace Battery Terminals Myself Safely?
Yes, you can replace terminals safely by disconnecting the negative cable first. Wear protective gear and avoid metal contact with battery parts. Follow proper steps to prevent sparks and ensure a secure connection.
How To Clean Corrosion From Battery Terminals?
Use a mixture of baking soda and water to neutralize corrosion. Apply with a brush, scrub terminals gently, then rinse and dry. This restores proper contact and extends terminal life before replacement.
Conclusion
Replacing a car battery terminal is simple and saves money. Always wear gloves and work carefully for safety. Tighten the new terminal well to avoid problems. Clean the battery post before attaching the new terminal. Check your work to ensure a good connection.
Regular maintenance helps your car start smoothly. Now, you can handle this task with confidence. Keep your tools ready for the next time. Small fixes like this keep your car reliable.