Is your Ford F150 stuck in brake service mode? It can be frustrating when your truck won’t respond the way it should.
You might feel unsure about what to do next or worry about costly repairs. But don’t worry—getting your F150 out of brake service mode is easier than you think. You’ll learn simple, step-by-step instructions that anyone can follow. By the end, your truck will be back to normal, and you’ll save time and money.
Keep reading to find out exactly how to fix this common issue fast and hassle-free.
What Is Brake Service Mode
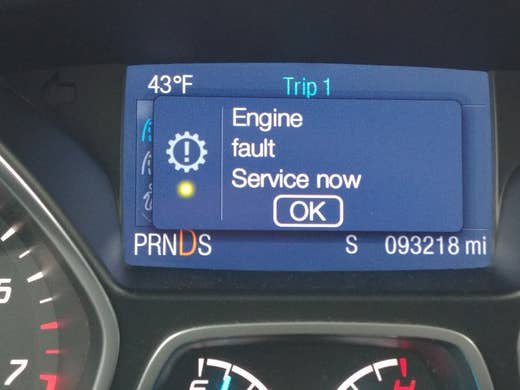
Brake Service Mode is a special setting in your Ford F150 designed to make brake maintenance easier and safer. When you activate this mode, the vehicle adjusts the brake system to allow you to work on the brakes without causing damage or triggering warning lights.
Think of it as a temporary pause on the brake system’s normal operation. This mode retracts the brake calipers slightly, creating enough space to replace brake pads or perform other brake-related tasks.
Have you ever struggled to fit new brake pads because the calipers wouldn’t budge? Brake Service Mode solves this problem by making the process smoother and faster.
Why Does The F150 Need Brake Service Mode?
The F150 uses advanced brake systems that can be sensitive during maintenance. Without Brake Service Mode, the electronic parking brake or brake sensors might react unexpectedly.
This mode prevents false alarms and protects the components while you work. It also keeps you safe by ensuring the brakes don’t engage accidentally.
How Does Brake Service Mode Work?
When you activate Brake Service Mode, the electronic parking brake releases pressure on the brake pads. The system then moves the calipers back slightly to create clearance.
This controlled adjustment lets you remove and install brake parts without forcing anything. Once you finish, exiting the mode restores normal brake function immediately.
When Should You Use Brake Service Mode?
- Replacing brake pads or rotors
- Performing brake caliper repairs
- Conducting brake system inspections that require pad movement
Skipping this step might cause damage or cause the brake warning light to come on. So, make sure to activate Brake Service Mode whenever you plan to work on the brakes.
Credit: www.powerstroke.org
When To Exit Brake Service Mode
Exiting brake service mode is necessary after completing brake repairs or maintenance on your F150. The process ensures the brake system returns to normal operation and safety features are reactivated. Always exit service mode before driving to avoid brake warnings or malfunctions.
Knowing when to exit the brake service mode on your F150 is crucial. It ensures your vehicle operates efficiently and safely. This mode is essential during maintenance but should not be active during normal driving. Understanding the right time to exit is key for optimal performance.
Understanding Brake Service Mode
Brake service mode allows for safe maintenance on your F150's brakes. This mode disables certain functions for easy servicing. Exiting this mode at the right time is important. Always check your vehicle's manual for specific guidance.
Signs It's Time To Exit
There are clear signs to exit brake service mode. If you’re done with brake maintenance, exit the mode. Another sign is when your dashboard indicates a return to normal operations. Listen for unusual noises during driving; this might suggest an exit is needed.
Potential Risks Of Staying In Mode
Staying in brake service mode can lead to problems. Your F150 might not perform at its best. You could experience reduced braking efficiency. This can compromise safety and vehicle control.
Steps To Exit Brake Service Mode
To exit, follow simple steps. First, ensure your work on the brakes is complete. Then, restart your vehicle to reset systems. Check your dashboard for any warnings. Confirm the mode is off before driving.
Tools Needed To Exit Brake Service Mode
Exiting the brake service mode on an F150 requires specific tools. These tools help reset the brake system safely and effectively. Having the right equipment ensures the process is smooth and prevents damage to the vehicle.
Some tools are basic and common in most garages. Others are designed specifically for brake systems. Knowing what you need saves time and avoids frustration.
Obd-ii Scanner
An OBD-II scanner reads and clears brake system codes. It connects to the vehicle's diagnostic port. This tool helps reset the brake service mode without guesswork. It is essential for modern vehicles like the F150.
Brake Service Tool Kit
This kit includes tools for brake pad replacement and calibration. It often contains a brake caliper piston tool. This tool compresses the piston to reset brake sensors. It makes the brake service mode exit process easier.
Basic Hand Tools
Wrenches, screwdrivers, and pliers are necessary. They help remove brake components safely. These tools assist in accessing brake parts for service mode reset.
Vehicle Owner’s Manual
The manual provides step-by-step instructions. It explains the brake system and service mode reset. Referring to the manual ensures the correct procedure is followed.

Credit: www.youtube.com
Step 1: Locate The Brake Caliper Switch
Locating the brake caliper switch is the first key task to take your F150 out of brake service mode. This switch plays a crucial role in the brake system. It signals the system when brake service mode is active.
The brake caliper switch is usually near the brake caliper itself. It might be attached directly or nearby on the brake assembly. Finding this switch helps you reset the system properly.
Knowing where to find the brake caliper switch saves time and avoids confusion. It also ensures you handle the brake system correctly and safely.
Check The Driver’s Side Front Wheel Area
Start by looking behind the driver’s side front wheel. The brake caliper switch is often mounted close to the brake caliper here. You may need to turn the wheel for better access and visibility.
Look For A Small Electrical Connector
The brake caliper switch has a small electrical connector. It connects to the brake system wiring harness. Identify this connector to find the switch quickly.
Use A Flashlight For Better Visibility
Lighting helps locate the switch in tight spaces. Use a flashlight to see inside the wheel well clearly. This tool makes spotting the switch easier.
Consult Your Vehicle Manual
The owner's manual often shows the exact location of the brake caliper switch. Refer to it for detailed diagrams and instructions. This can speed up the process significantly.
Step 2: Turn The Ignition On
Turning the ignition on is a crucial part of taking your F150 out of brake service mode. This step wakes up the vehicle’s electrical system and prepares it for the reset process. Without turning the ignition on properly, the system won’t register the commands needed to exit brake service mode.
When you turn the key to the “on” position, you’re not starting the engine, but activating the dashboard lights and electronic modules. This lets you access the brake control module and other systems involved in the reset. Have you noticed how some dashboard lights flicker or stay on during this stage? That’s a sign your truck is ready for the next action.
How To Properly Turn The Ignition On
- Insert the key into the ignition slot.
- Turn the key clockwise to the “on” position without starting the engine.
- Check that the dashboard lights come on, especially the brake warning light.
Some newer F150 models use a push-button start. In that case, press the button twice without pressing the brake pedal. This also puts the truck into the “on” mode without starting the engine.
Common Mistakes To Avoid When Turning The Ignition On
- Starting the engine instead of just turning the ignition on.
- Not waiting for the dashboard lights to fully illuminate.
- Turning the key back off too quickly before the system recognizes the mode.
One time, I rushed through this step and started the engine immediately. The brake service mode didn’t reset, and I had to start over. Taking a moment to ensure the ignition is on and all lights are active can save you frustration.
Why Is Turning The Ignition On Essential?
This step communicates to the truck’s computer that you are about to perform a system reset. It activates the electronic brake control module and allows it to accept reset commands. Skipping or rushing this step can cause your truck to stay stuck in brake service mode.
Have you ever wondered why certain dashboard lights stay lit after turning the ignition on? It’s your truck’s way of telling you it’s ready for the next step. Paying attention here makes the whole process smoother.
Credit: www.youtube.com
Step 3: Press The Brake Pedal
Pressing the brake pedal is a crucial action to take your F150 out of brake service mode. This step signals to the vehicle's system that you are ready to reset and resume normal brake function. It's a simple action but requires a bit of care and timing to ensure the process works smoothly.
Why Pressing The Brake Pedal Matters
The brake pedal acts as a communication tool between you and your truck's brake system. Pressing it engages the hydraulic system and allows the onboard computer to register the reset command. Without this step, the vehicle may remain stuck in service mode, which can affect driving safety.
How To Properly Press The Brake Pedal
- Use firm, steady pressure — avoid pumping or quick presses.
- Keep the pedal pressed for at least 5 seconds to ensure the system recognizes the input.
- Make sure your foot covers the pedal fully to avoid partial activation.
Common Mistakes To Avoid
Don't release the brake pedal too quickly; the system needs that consistent signal. Avoid pressing the pedal lightly or in short bursts, as this might confuse the reset process. Also, ensure your vehicle is in park or neutral before pressing the pedal to prevent any safety issues.
What Happens After Pressing The Brake Pedal?
Once you hold the brake pedal down, the F150’s system will start resetting the brake service mode. You might hear a slight sound or see a dashboard indicator change. If nothing happens, double-check your pedal pressure and try again — patience here can save you a trip to the mechanic.
Step 4: Use The Brake Caliper Switch
Using the brake caliper switch is an important part of taking the F150 out of brake service mode. This switch helps reset the brake system and clear the service mode. It is a simple tool that works directly with the brake caliper to bring the system back to normal operation.
Understanding how to use the brake caliper switch correctly saves time and avoids confusion. It ensures your brakes work safely after maintenance or repairs. Follow the steps carefully to use the switch effectively.
Locate The Brake Caliper Switch
First, find the brake caliper switch on your F150. It is usually near the brake caliper assembly. Look for a small button or lever attached to the brake caliper.
Consult your vehicle manual if you have trouble finding it. The switch position may vary depending on the model year.
Press And Hold The Brake Caliper Switch
Once located, press and hold the brake caliper switch. Keep it pressed for about 10 to 15 seconds. This action sends a signal to reset the brake system.
Maintain steady pressure without releasing too soon. Patience here ensures the reset process starts correctly.
Check For Brake Service Mode Exit
After releasing the switch, check if the brake service mode has ended. Look at the dashboard for any brake warnings. The brake light should turn off if the reset worked.
If the light stays on, repeat the process or try other reset methods.
Test The Brake System
Finally, test the brakes by gently pressing the brake pedal. The pedal should feel firm and responsive. This test confirms the brake system is back to normal.
Drive slowly at first to ensure everything functions well. Safety is the priority before regular driving.
Step 5: Verify Brake Service Mode Is Off
After you’ve completed the necessary steps to take your Ford F150 out of Brake Service Mode, it’s crucial to confirm that the mode is actually turned off. Verifying this ensures your brake system is fully operational and safe to use. Skipping this verification can lead to unexpected issues or warning lights on your dashboard.
Check The Dashboard Warning Lights
Start by turning your ignition to the “On” position without starting the engine. Look closely at your dashboard for any brake-related warning lights. If the Brake Service Mode is off, the brake warning light should disappear quickly or not appear at all.
If the light stays on, it may mean the system hasn’t exited service mode properly. This is a sign to repeat the reset process or check for other brake system problems. Have you ever ignored a warning light and regretted it later?
Test The Brake Pedal Response
Press the brake pedal firmly and feel for normal resistance and travel. If the pedal feels soft, spongy, or unusually hard, the brake system might still be in service mode or have an issue. Proper pedal feel confirms the brake system is back to normal operation.
Try moving the vehicle slowly while applying the brakes lightly. Does it respond as expected? This simple test can save you from dangerous situations on the road.
Use An Obd-ii Scanner For Confirmation
If you have access to an OBD-II scanner, plug it into your vehicle’s port and check the brake system status. The scanner will show if any brake service mode codes are still active. Clearing these codes and confirming none reappear is the best way to verify the mode is off.
This tool provides a clear, technical confirmation beyond dashboard indicators. Do you have an OBD-II scanner handy, or is it time to get one for your toolkit?
Common Issues And Troubleshooting
Common issues can prevent your F150 from exiting brake service mode. These problems often cause confusion and delay. Knowing what to check speeds up the fix and gets your truck back on the road.
Some issues are simple electrical faults, while others involve the brake system itself. Troubleshooting these helps avoid costly repairs and unsafe driving conditions.
Electrical Connection Problems
Loose or corroded connectors often trigger brake service mode. Check battery terminals and wiring harnesses for damage or rust. Clean and tighten any loose connections. Faulty sensors or damaged wires can also cause errors.
Faulty Brake Switch
The brake switch signals the system when you press the pedal. A broken or misaligned switch may keep the truck in service mode. Test the switch with a multimeter. Replace it if it fails to work properly.
Brake Fluid Level And Quality
Low or dirty brake fluid affects brake system operation. Inspect the fluid reservoir and top it off if needed. Flush and replace old brake fluid to restore proper function. Use the recommended fluid type for your F150.
Abs Sensor Issues
ABS sensors monitor wheel speed and help control brakes. Dirt, damage, or misalignment can cause sensor errors. Clean the sensors and check their wiring. Replace any sensors that show signs of failure.
Brake Caliper And Pad Problems
Worn or stuck brake calipers and pads can activate brake service mode. Inspect the brakes for uneven wear or damage. Replace pads or repair calipers as necessary to ensure smooth braking.
Resetting The Brake Service Mode
- Turn the ignition to ON without starting the engine.
- Press and hold the brake pedal firmly.
- Use the dashboard menu to access brake settings.
- Select the option to reset brake service mode.
- Release the brake pedal and turn off the ignition.
- Start the engine and verify the service mode is off.
Tips To Avoid Brake Service Mode Activation
Avoid pressing the brake pedal too hard when starting the truck to prevent service mode activation. Keep the brake system clean and check sensors regularly to maintain proper function. Resetting the system can help take the F150 out of brake service mode quickly.
Avoiding brake service mode activation in your F150 can save time and hassle. Proper maintenance and driving habits play a key role in preventing this issue. Let's explore some effective tips to help keep your F150 running smoothly without unexpected brake service interruptions.
Regular Brake System Maintenance
Regular check-ups ensure your brakes function properly. Inspect brake pads and rotors for wear. Replace worn-out parts to maintain optimal performance. A well-maintained brake system reduces the risk of service mode activation.
Avoid Aggressive Driving
Aggressive driving increases brake wear. Frequent, hard braking can trigger service mode. Drive smoothly and maintain a safe distance from other vehicles. This practice not only enhances safety but also prolongs brake life.
Keep Brake Fluid Levels In Check
Low brake fluid can cause issues. Regularly check the brake fluid level. Top up with the recommended type if needed. This simple step helps prevent unnecessary activation of brake service mode.
Monitor Dashboard Alerts
Pay attention to dashboard alerts. They provide early warnings of potential issues. Address any brake-related alerts promptly. This proactive approach minimizes the risk of entering service mode.
Ensure Proper Tire Maintenance
Tires impact brake performance. Maintain correct tire pressure and alignment. Check for uneven wear regularly. Proper tire maintenance supports efficient braking and reduces service mode chances.
Educate Yourself On Brake System Functions
Understanding your F150’s brake system helps identify issues early. Familiarize yourself with how it operates. Awareness of normal function aids in detecting abnormalities. This knowledge assists in preventing service mode activation. By following these tips, you can help keep your F150 out of brake service mode and enjoy a smoother driving experience.
Frequently Asked Questions
How Do I Exit Brake Service Mode On My F150?
To exit brake service mode on your F150, release the parking brake fully. Then, start the vehicle and drive slowly. The system will automatically reset and disable the service mode once brakes are used normally.
Why Is My F150 Stuck In Brake Service Mode?
Your F150 may be stuck in brake service mode due to incomplete brake system reset or sensor issues. Ensure the parking brake is fully released and check for error codes. A manual reset via the vehicle’s settings might be necessary.
Can I Reset F150 Brake Service Mode Without A Tool?
Yes, you can reset the F150 brake service mode without a special tool. Release the parking brake, start the engine, and drive a short distance. The system usually resets automatically after normal brake use.
What Causes F150 To Enter Brake Service Mode?
The F150 enters brake service mode when the parking brake is applied or brake system maintenance is needed. This mode prevents brake pad wear and alerts you during brake repairs or replacements.
Conclusion
Taking your F150 out of brake service mode is simple with the right steps. Follow the guide carefully to avoid mistakes. Check your brake system and reset the mode properly. This helps keep your truck safe and working well. Remember to stay patient and double-check each step.
A smooth ride depends on good brake maintenance. Keep this process in mind for future needs. Your F150 will thank you with better performance and safety.