Have you ever wondered what it takes to build a car engine from scratch? Imagine turning a pile of metal parts into a powerful machine that can make your car roar down the road.
It might sound complicated, but with the right steps and a clear plan, you can understand how it’s done. You’ll discover the essential parts, simple techniques, and key tips that will guide you through the process. By the end, you’ll see that building a car engine is not just for experts—it’s something you can grasp and even try yourself.
Ready to unlock the secrets behind every car’s heartbeat? Let’s dive in.
Engine Basics
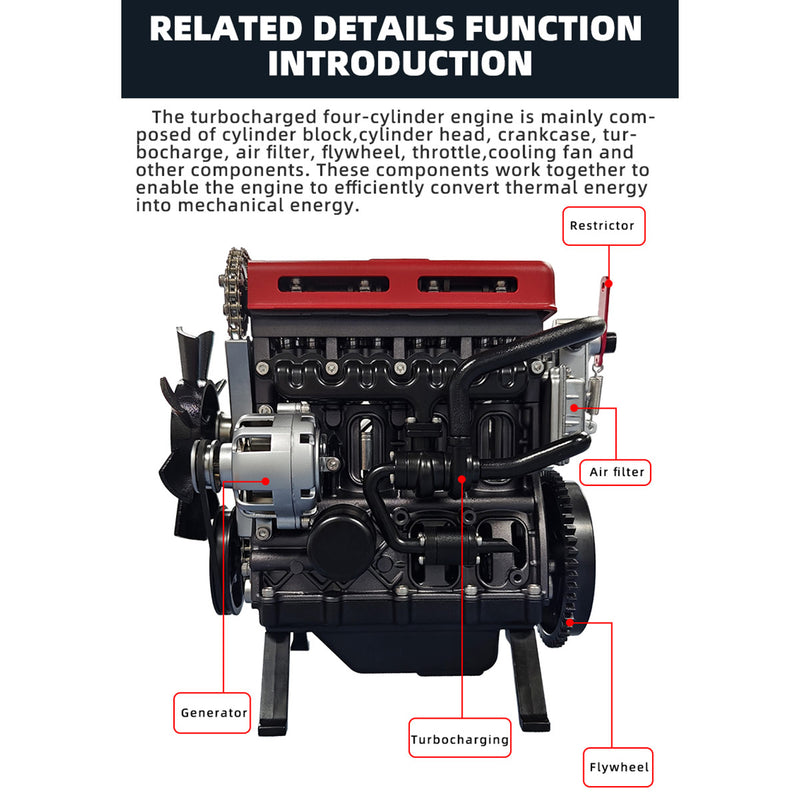
Building a car engine starts with understanding its basic parts and how they work together. The engine is the heart of a car. It converts fuel into power to move the vehicle. Knowing the engine basics makes the building process easier and safer.
Key Components
- Engine Block:The main structure holding all parts.
- Pistons:Move up and down to create power.
- Crankshaft:Converts piston movement into rotation.
- Camshaft:Controls the opening and closing of valves.
- Valves:Let air in and exhaust out.
- Spark Plugs:Ignite the fuel-air mix.
- Fuel Injector/Carburetor:Supplies fuel to the engine.
Types Of Engines
- Inline Engine:Cylinders arranged in a straight line.
- V Engine:Cylinders form a V shape.
- Boxer Engine:Cylinders lie flat in two banks.
- Electric Engine:Uses electric power instead of fuel.
How Engines Work
The engine works by burning fuel inside the cylinders. This process creates pressure that pushes the pistons down. The pistons move the crankshaft, which turns the wheels.
Engines use four main strokes:
- Intake:Air and fuel enter the cylinder.
- Compression:Pistons compress the mix.
- Power:Spark plugs ignite the mix, pushing pistons.
- Exhaust:Waste gases exit the cylinder.
This cycle repeats many times per second to keep the car moving.
Tools And Materials
Building a car engine requires the right tools and materials. These items help ensure the engine works well and lasts long. Having everything ready before starting saves time and avoids mistakes.
Each tool and part plays a role in assembling the engine properly. Safety gear protects you during the process. Understanding these essentials makes the build smoother and safer.
Essential Tools
- Socket set with various sizes
- Torque wrench for precise tightening
- Screwdrivers, both flathead and Phillips
- Pliers and needle-nose pliers
- Engine hoist or crane
- Feeler gauges to measure gaps
- Micrometer and caliper for exact measurements
- Breaker bar for loosening tight bolts
- Oil filter wrench
- Rubber mallet for gentle tapping
Required Parts
| Part | Purpose |
|---|---|
| Engine block | Main structure of the engine |
| Pistons | Move up and down to create power |
| Crankshaft | Converts piston motion into rotation |
| Camshaft | Controls valve opening and closing |
| Valves | Allow air and fuel in, exhaust out |
| Connecting rods | Connect pistons to crankshaft |
| Timing belt or chain | Synchronizes camshaft and crankshaft |
| Gaskets | Seal engine parts to prevent leaks |
| Oil pump | Circulates oil for lubrication |
Safety Gear
- Safety glasses to protect eyes from debris
- Gloves to prevent cuts and burns
- Ear protection when using loud tools
- Closed-toe shoes for foot safety
- Protective clothing to avoid stains and injuries
- Proper ventilation to reduce fumes
Preparing The Workspace
Clear a large, clean area to keep tools and parts organized. Good lighting helps you see small details clearly. Gather all necessary tools before starting to build the engine.
Preparing the workspace is crucial before building a car engine. A well-organized area helps avoid mistakes and saves time. It ensures you have everything needed at hand. Let's break down how to effectively set up your space.
Organizing Tools
Start by gathering all necessary tools. Arrange them neatly on a workbench. Use toolboxes or pegboards to keep them accessible. Label each tool’s place for easy return. This saves time searching for tools during engine assembly.
Cleaning The Area
A clean workspace prevents dirt from entering engine parts. Sweep the floor and wipe surfaces. Ensure there is no oil or grease on your workbench. This keeps components clean and secure. Use a vacuum to remove dust from the area.
Setting Up Lighting
Good lighting is essential for detailed work. Install bright lights above your workspace. Use adjustable lamps for focused light on specific areas. Proper lighting reduces eye strain and improves accuracy. Test lights to ensure no shadows obstruct your view.
Assembling The Engine Block
Assembling the engine block is a crucial phase in building a car engine. It forms the foundation where many parts come together. This step requires focus, precision, and the right tools. The block holds the cylinders, pistons, and crankshaft. Each component must fit perfectly for the engine to work smoothly.
Inspecting The Block
Start by carefully inspecting the engine block. Look for cracks, rust, or damage on the surface. Check the cylinder walls for smoothness and uniformity. Use a micrometer to measure cylinder bore diameter. Make sure all mounting points are clean and intact. Remove any debris or old gasket material. Proper inspection prevents future engine problems.
Installing Pistons And Rings
Next, prepare pistons and rings for installation. Fit the piston rings carefully around each piston. Ensure the ring gaps are spaced evenly to avoid compression loss. Lubricate the piston and rings with engine oil. Slide pistons gently into the cylinder bores. Use a ring compressor tool for easy insertion. Confirm pistons move freely without binding.
Fitting The Crankshaft
The crankshaft connects to the pistons and converts movement into power. Place the crankshaft into the main bearings inside the engine block. Apply assembly lube to bearing surfaces for smooth operation. Secure the crankshaft with main caps and bolts. Tighten bolts to the correct torque using a torque wrench. Rotate the crankshaft by hand to check for smooth motion.
Installing The Cylinder Head
Installing the cylinder head is a critical part of building a car engine. This step ensures that the combustion chamber is sealed properly, allowing your engine to run efficiently and powerfully. Taking time to do this right prevents leaks and costly repairs down the road.
Preparing The Head
Start by cleaning the cylinder head thoroughly. Remove any old gasket material, dirt, or oil using a scraper and a suitable solvent. A clean surface is essential for a proper seal and prevents warping or damage.
Inspect the head for cracks or warping. Even slight imperfections can lead to engine problems later. Use a straight edge and feeler gauge to check flatness—this small step can save you from big headaches.
Placing The Gasket
The gasket acts as a seal between the cylinder head and the engine block. Handle it carefully to avoid bending or damaging it. Make sure the gasket matches your engine model exactly—using the wrong type can cause leaks.
Lay the gasket flat on the engine block, aligning all holes for coolant and oil passages. Double-check the orientation before moving on. It’s easy to misplace, and a misaligned gasket means a failed seal.
Securing The Head Bolts
Head bolts must be tightened in the correct order and to the right torque specification. This step ensures even pressure distribution and prevents warping. Use a torque wrench to avoid guessing and damaging the head.
Follow the manufacturer’s recommended tightening sequence, usually starting from the center bolts and moving outward in a spiral pattern. Tighten bolts gradually in stages rather than all at once. Have you ever skipped this step and dealt with a warped head? It’s not worth the risk.
Credit: www.stirlingkit.com
Mounting The Camshaft And Valves
Mounting the camshaft and valves is a critical phase in building a car engine. This process directly impacts engine performance and longevity. You must handle it with precision and patience to ensure smooth operation.
Positioning The Camshaft
Start by carefully placing the camshaft into its bearings within the engine block. Ensure the cam lobes align correctly with the lifters or tappets. Misalignment here can cause uneven wear or engine damage.
Use assembly lube to reduce friction during initial startup. Check that the camshaft rotates freely without binding. Remember, tight spots often signal incorrect positioning or debris.
Adjusting Valve Clearance
Valve clearance is the small gap between the valve stem and the rocker arm or camshaft lobe. Proper clearance prevents valves from sticking or not closing fully. Too tight or too loose can affect engine noise and efficiency.
Use a feeler gauge to measure the gap accurately. Adjust by loosening the lock nut and turning the adjustment screw until you achieve the specified clearance. Double-check each valve, as small differences can add up to big problems.
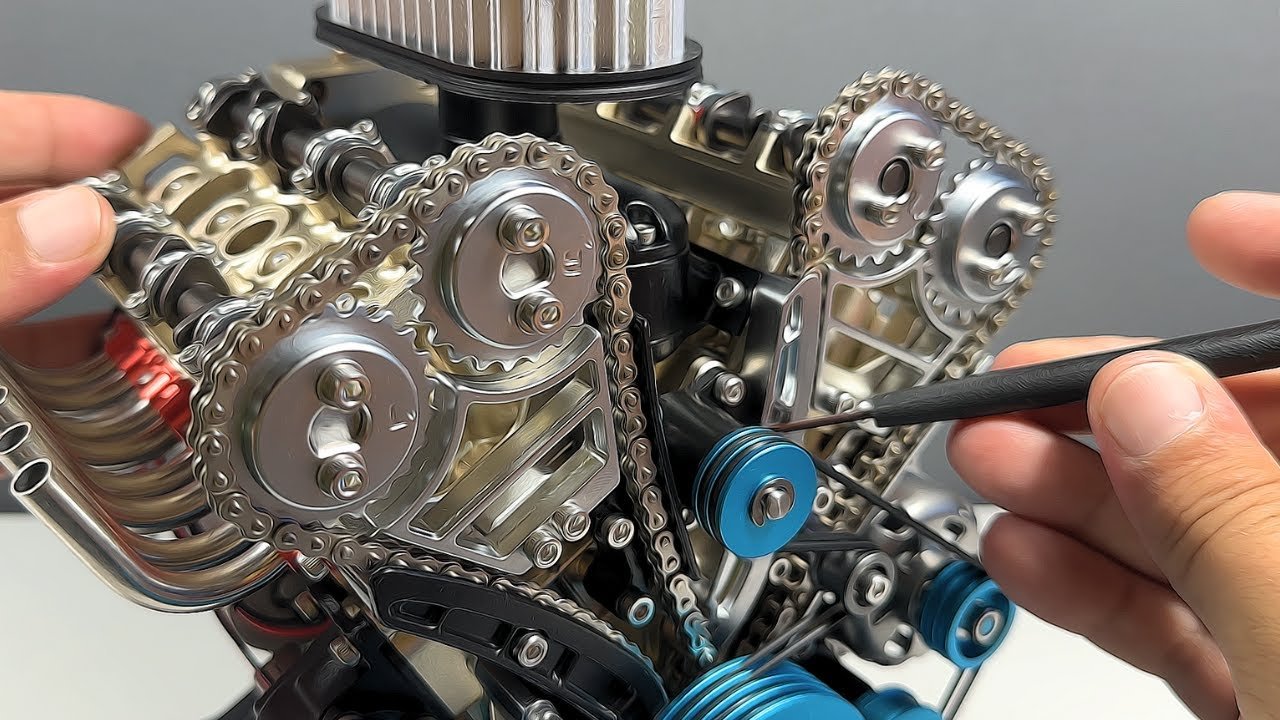
Timing The Valves
Valve timing synchronizes the opening and closing of valves with piston movement. Accurate timing ensures efficient air-fuel intake and exhaust expulsion. Incorrect timing can cause poor performance or even engine damage.
Align timing marks on the camshaft sprocket and crankshaft pulley carefully. Rotate the engine by hand to verify that valves open and close at the right moment. Ask yourself: have you given enough attention to this step? It can make or break your engine build.
Adding The Fuel System
Adding the fuel system is a crucial step in building a car engine. It ensures that the engine gets the right amount of fuel for combustion, which directly affects performance and efficiency. Paying close attention here can save you from issues like poor fuel delivery or engine stalling later on.
Installing The Fuel Injectors
Fuel injectors spray fuel directly into the engine’s combustion chamber. When installing them, make sure each injector fits snugly in its place to avoid leaks. Use new seals and clean the injector ports thoroughly to ensure smooth fuel flow.
Did you know that a clogged injector can cause misfires? Testing each injector with a multimeter before installation can help you avoid future headaches. Always connect the injector harness securely to prevent electrical issues.
Connecting Fuel Lines
Fuel lines carry fuel from the tank to the engine. Use high-quality, fuel-rated hoses and clamps to prevent leaks or bursts. Routing the lines away from heat sources is essential to keep the fuel cool and reduce the risk of vapor lock.
Check for tight connections at every joint. Even a small leak can cause serious safety hazards. Have you double-checked your fuel line paths for sharp bends or potential wear spots?
Setting Up The Carburetor
If your engine uses a carburetor, it needs to be set up precisely for proper fuel-air mixture. Start by mounting it securely on the intake manifold with a clean gasket. Adjust the idle mixture screws to get the smoothest engine idle.
Remember, slight tweaks in the carburetor can make a big difference in throttle response. Consider tuning it on a running engine to find the perfect balance. Have you thought about how altitude or temperature changes might affect your carburetor settings?
Credit: enginekitor.com
Wiring And Electrical Setup
The wiring and electrical setup is the backbone of your car engine's performance. Without a reliable electrical system, even a perfectly built engine won’t start or run smoothly. Paying close attention to how you connect each wire and component ensures your engine communicates effectively with sensors and ignition systems.
Connecting The Ignition System
Start by linking the ignition coil to the distributor or ignition module. This connection delivers the spark needed to ignite the fuel-air mixture in the cylinders. Make sure your connections are tight and insulated to avoid shorts or misfires.
Remember, a loose wire here can cause your engine to stall unexpectedly. Use quality connectors and double-check the wiring diagram specific to your engine model. Have you ever experienced a no-start condition because of a simple loose ignition wire? Avoid that frustration by being thorough.
Wiring Sensors
Sensors like the crankshaft position sensor, coolant temperature sensor, and oxygen sensors provide crucial data to the engine control unit (ECU). Correct wiring ensures these sensors send accurate signals for optimal engine timing and fuel delivery.
Label each sensor wire as you connect it. This practice helps when troubleshooting electrical issues later on. Use shielded wires where possible to reduce electrical noise that can confuse the ECU.
Testing Electrical Components
After wiring, testing is non-negotiable. Use a multimeter to check for continuity and proper voltage at each connection point. This step catches wiring errors before you try starting the engine.
Don’t overlook testing relays and fuses—they protect your system from damage. What’s your plan if a sensor wire fails mid-drive? Testing upfront saves you from roadside breakdowns and costly repairs.
Final Checks And Testing
Final checks and testing are crucial before your car engine runs smoothly. This stage ensures everything works safely and as planned. Careful inspection avoids damage and costly repairs later.
Inspecting For Leaks
Check all connections for oil, coolant, and fuel leaks. Use a clean cloth to spot wet or shiny areas. Tighten any loose clamps or bolts. Leaks reduce engine efficiency and cause serious problems.
Checking Torque Settings
Verify that all bolts meet the recommended torque values. Use a torque wrench for accuracy. Focus on cylinder head bolts, main caps, and intake manifolds. Proper torque prevents engine parts from loosening or warping.
Starting The Engine
Before starting, ensure oil and coolant levels are correct. Turn the key and listen for unusual noises. Let the engine idle and watch for warning lights. Monitor temperature and oil pressure gauges closely. Shut down immediately if something feels wrong.
Troubleshooting Common Issues
Common engine building problems include misaligned parts and loose bolts. Checking each component carefully helps avoid costly mistakes. Simple fixes often solve many engine troubles quickly.
Building a car engine is an exciting journey filled with learning and challenges. However, even the best-laid plans can hit a snag. Understanding how to troubleshoot common issues is crucial for a smooth engine-building experience. This section will guide you through solving some typical problems you might face, so you can keep your project on track and your engine purring like a kitten.
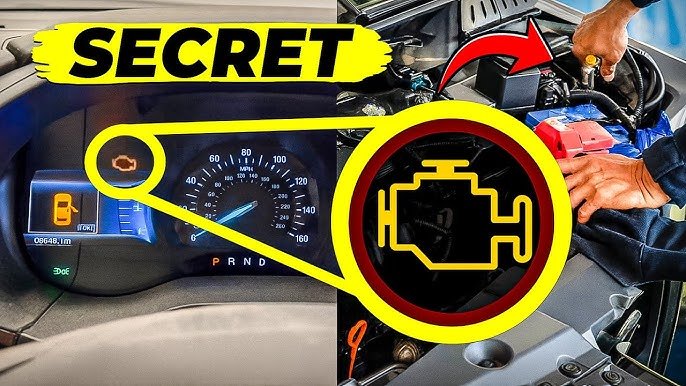
Engine Won’t Start
Nothing is more frustrating than turning the key and hearing silence. Start by checking the basics: is the battery charged, and are the connections tight? Verify that fuel is reaching the engine; a clogged fuel line can stop your engine from starting. Sometimes, the issue might be as simple as a faulty ignition switch or a blown fuse. If those basics don’t solve the issue, consider testing the starter motor. A worn-out starter motor can prevent your engine from cranking. Also, ensure your spark plugs are in good condition and correctly gapped. This small component plays a big role in igniting the engine.
Unusual Noises
Strange sounds coming from your engine can be unsettling. These noises often signal underlying problems. If you hear knocking or pinging, your engine might be experiencing detonation. This can be caused by using the wrong type of fuel or having incorrect ignition timing. Rattling sounds might indicate loose parts. Double-check that all bolts and components are tightened to the correct specifications. A ticking noise could mean the valve train needs adjustment, particularly if you've recently rebuilt your engine.
Overheating Problems
Overheating is a common issue that can damage your engine if not addressed promptly. First, ensure there is enough coolant in the system and that there are no leaks. Inspect the radiator and hoses for any signs of wear or blockage. The thermostat might be stuck, causing the engine to overheat. Consider replacing it if it's old or malfunctioning. Another potential culprit is the water pump; if it's not circulating coolant properly, it may need replacement. Regularly flushing the cooling system can prevent buildup and improve efficiency. Taking these steps not only helps in resolving issues but also enhances your understanding of your engine. Have you faced any of these challenges before? What solutions worked for you? Sharing insights can help others in their engine-building journey too.
Credit: www.stirlingkit.com
Frequently Asked Questions
What Are The Basic Parts Of A Car Engine?
A car engine mainly includes the cylinder block, pistons, crankshaft, camshaft, valves, and spark plugs. These parts work together to convert fuel into mechanical energy. Understanding each component helps in building or repairing an engine efficiently.
How Long Does It Take To Build A Car Engine?
Building a car engine typically takes several days to weeks. The time depends on complexity, experience, and available tools. Precision and careful assembly are crucial to ensure the engine runs smoothly and reliably.
What Tools Are Essential For Building A Car Engine?
Key tools include a torque wrench, socket set, engine hoist, feeler gauge, and screwdrivers. These tools help in precise assembly and measurement. Using proper tools ensures safety and accuracy during the engine-building process.
Can Beginners Build A Car Engine At Home?
Beginners can build a car engine with proper guidance and patience. Start by learning engine basics and following detailed manuals. Practice and attention to detail are essential to avoid costly mistakes.
Conclusion
Building a car engine takes patience and careful steps. Each part must fit and work well together. Understanding basic tools and parts helps a lot. Practice and attention make the process easier. Keep learning and don’t rush the work. This guide gives a clear path to start.
Remember, every engine you build teaches something new. Enjoy the challenge and keep improving your skills.