Is your 2015 Nissan Altima’s headlight flickering or completely out? Replacing a headlight bulb might seem tricky, but you can do it yourself quickly and safely.
Imagine driving at night with bright, clear headlights that make the road ahead visible and keep you safe. In this guide, you’ll find simple, step-by-step instructions to replace your headlight bulb without any confusion or costly trips to the mechanic.
Keep reading—your car’s lighting and your peace of mind depend on it.
Tools And Materials Needed
Before you start replacing the headlight bulb on your 2015 Nissan Altima, it’s important to gather the right tools and materials. Having everything on hand makes the process smoother and safer. Missing a tool halfway through can turn a simple task into a frustrating ordeal.
Think about the last time you tried fixing something without the proper tools. How much longer did it take? Having the correct items ready saves you time and spares you stress.
Headlight Bulb Type
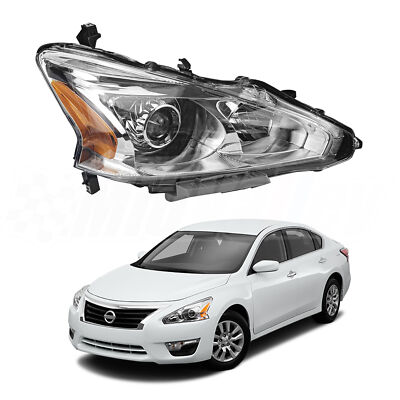
First, you need the right replacement bulb. The 2015 Nissan Altima typically uses a 9005 (HB3) halogen bulb for the high beam and a 9006 (HB4) for the low beam. Double-check your owner’s manual or the bulb itself to ensure you pick the exact match.
Basic Hand Tools
- Phillips and Flathead Screwdrivers:These help remove screws and clips securing the headlight assembly or cover.
- Socket Wrench Set:A 10mm socket is commonly needed to unbolt the headlight housing.
- Pliers:Useful for handling clips or stubborn connectors.
Protective Gear
Don’t overlook safety. Gloves protect your hands from sharp edges and keep oil off the bulb, which can reduce its lifespan. Safety glasses shield your eyes from debris when working close to the engine bay.
Additional Materials
- Clean Cloth or Paper Towels:Use these to wipe the bulb or clean the headlight lens if needed.
- Electrical Contact Cleaner:Optional but helpful if connectors are dirty or corroded.
Are you ready to check your glove box or tool kit? Having these tools ready puts you in control and speeds up the replacement process. What’s one tool you never thought you’d need but found invaluable during car maintenance?

Credit: www.youtube.com
Preparing Your Vehicle
Preparing your 2015 Nissan Altima for a headlight bulb replacement is key for a smooth process. Proper preparation helps avoid damage and keeps you safe. Take your time before starting the job to set everything up right.
Safety Precautions
Make sure the car engine is off before working on the headlights. Remove the keys from the ignition to avoid any electrical issues. Let the bulbs cool down if they were recently on. Wear gloves to protect your hands and avoid touching the new bulb glass. Work in a well-lit area with enough space around the car. Keep the car on a flat surface and use the parking brake for stability.
Accessing The Headlight Assembly
Open the car hood and locate the headlight assembly at the front corners. Clear any dirt or debris around the assembly for better visibility. Some parts may block direct access to the bulb. Remove the plastic cover or screws if needed, using the right tools. Gently pull back the wiring connector from the bulb without forcing it. Keep all removed parts safe for reassembly later.
Removing The Old Bulb
Removing the old headlight bulb from your 2015 Nissan Altima is a straightforward task, but it requires careful handling to avoid damaging any components. You’ll want to make sure you have a clear workspace and the right tools before you begin. Let’s break down the process into manageable steps so you can replace the bulb with confidence.
Locating The Bulb Socket
First, pop the hood and find the back of the headlight assembly. The bulb socket is usually a round plastic piece sticking out behind the headlight lens. It might be covered by a dust cap—don’t rush past it.
Removing that dust cap is crucial because it protects the bulb and wiring from dirt and moisture. If you don’t see the socket immediately, check your owner’s manual or look for the wiring that leads directly to the headlight.
Disconnecting The Wiring
Once you’ve located the bulb socket, it’s time to disconnect the wiring harness. This connection powers the bulb, so you need to gently pull it off without yanking or twisting hard. If the connector feels stuck, wiggle it slowly to loosen it.
Keep in mind that some wiring connectors have a small tab you need to press down or lift to release the plug. Don’t force it or you risk breaking the clip. Handling the wiring carefully will save you from additional repairs.
Taking Out The Bulb
With the wiring disconnected, you can now remove the bulb from the socket. Most Nissan Altima bulbs twist out—turn it counterclockwise until it releases. If it feels stuck, check for any locking clips or screws holding it in place.
Be cautious not to touch the glass part of the new bulb with your fingers if you’ve already got it nearby. Oils from your skin can shorten the bulb’s life. Have you ever noticed a bulb burn out quickly after replacement? That’s often the reason why.
Credit: www.ebay.com
Installing The New Bulb
Installing the new headlight bulb on your 2015 Nissan Altima is a straightforward task that demands careful handling and precise placement. This part of the process is crucial to ensure your headlights function properly and last as long as possible. Let’s focus on how to manage the new bulb safely, secure it firmly, and reconnect the wiring correctly for optimal performance.
Handling The New Bulb
Always avoid touching the glass part of the bulb with your fingers. Oils and dirt from your skin can cause the bulb to overheat and fail prematurely.
Use clean gloves or a soft cloth to hold the bulb. This simple step can save you from replacing the bulb much sooner than expected.
Securing The Bulb In Place
Insert the bulb carefully into the headlight socket, aligning it as shown in your vehicle’s manual. Make sure it fits snugly without forcing it in, which can damage the bulb or socket.
Once positioned, fasten any clips or screws that hold the bulb. A loose bulb can cause flickering or uneven lighting, which is unsafe when driving at night.
Reconnecting The Wiring
After the bulb is in place, reconnect the wiring harness securely. Ensure the connector clicks into place to avoid electrical issues.
Double-check your connection by gently tugging the wire—if it comes loose, your headlights won’t work properly.
Have you ever wondered why a simple bulb replacement sometimes leads to headlight problems? It often comes down to handling and connection mistakes. Paying attention to these details can save you time and headaches later.
Testing The New Headlight
After replacing the headlight bulb on your 2015 Nissan Altima, testing is crucial. It ensures everything works perfectly and your car is safe for the road. Proper testing prevents future issues and confirms correct installation. Follow the steps below to test your new headlight efficiently.
Inspect The Bulb Connection
Check if the bulb is securely connected. A loose connection may cause flickering. Ensure the bulb fits snugly in its socket.
Turn On The Headlights
Start the car and turn on the headlights. Stand in front of the car and observe if both lights are working. Compare the new bulb’s brightness with the other.
Check The Beam Alignment
Ensure the new bulb’s beam aligns with the old one. Misaligned beams can be dangerous. Adjust if necessary to avoid blinding other drivers.
Test In A Dark Area
Park in a dark area or garage. Turn on the lights and observe the beam pattern. Check for even lighting and no dark spots.
Drive Safely
Take a short drive at night. Observe the road illumination. Ensure the new bulb lights up the path clearly.

Credit: www.amazon.com
Tips For Maintenance And Safety
Maintaining your 2015 Nissan Altima’s headlights goes beyond just swapping out bulbs. Keeping your headlights in top shape ensures your safety and those around you, especially during night drives or bad weather. Here are some practical tips to help you maintain and handle your headlights safely.
Regularly Check Headlight Functionality
Do you take a moment to check your headlights before heading out? It’s a simple habit that can save you from unexpected issues on the road. Make it a routine to test both high and low beams, as well as turn signals, once a week.
If you notice dimming or flickering, don’t ignore it. These signs often mean it’s time to replace the bulbs or check the wiring. Waiting too long could reduce your visibility and increase the risk of accidents.
Handle Bulbs With Care
When replacing a headlight bulb, avoid touching the glass part with your bare hands. Oils from your skin can create hot spots on the bulb, leading to premature failure. Use a clean cloth or gloves to handle the bulb safely.
This small step can extend the life of your new bulbs significantly. Have you ever replaced a bulb only to find it burnt out quickly? This is often why.
Keep Headlight Lenses Clean
Dirty or cloudy lenses reduce the brightness and reach of your headlights. Regularly clean them using a soft cloth and mild soap. Avoid harsh chemicals that can damage the plastic lens.
If your lenses become foggy or yellowed over time, consider using a headlight restoration kit. Clear lenses improve your visibility and enhance the overall look of your Altima.
Ensure Proper Alignment
Misaligned headlights can blind other drivers or leave you with poor road visibility. If you notice your headlights pointing too high or too low, get them checked and adjusted. This might require a visit to a professional or using a guide to align them yourself.
Have you ever been flashed by oncoming cars at night? That’s often a sign your headlights are out of alignment. Fixing this improves safety for everyone.
Use The Right Replacement Bulbs
Always use bulbs that match your 2015 Nissan Altima’s specifications. Using incorrect bulbs can cause electrical issues or damage the headlight housing. Check your owner’s manual or consult a trusted auto parts store to find the correct bulb type.
Are you tempted to pick the cheapest bulb? It might save money upfront but could cost you more in the long run with poor performance or frequent replacements.
Frequently Asked Questions
How Do I Replace The Headlight Bulb On A 2015 Nissan Altima?
To replace the headlight bulb, open the hood and locate the back of the headlight assembly. Remove the power connector, twist out the old bulb, and install the new one. Reconnect the power connector and test the headlight.
What Tools Are Needed To Change The Headlight Bulb?
You typically need a flathead screwdriver and gloves. The screwdriver helps remove clips or screws, and gloves protect the bulb from oils and dirt. Most Nissan Altima bulbs can be replaced without complex tools.
How Long Does It Take To Replace The Headlight Bulb?
Replacing a headlight bulb on a 2015 Nissan Altima usually takes 10 to 15 minutes. It’s a simple process if you follow the steps carefully and have the right bulb.
Can I Use Any Bulb For My Nissan Altima Headlights?
No, use the specific bulb type recommended in your owner’s manual. Using the correct bulb ensures proper fit, brightness, and safety. For the 2015 Altima, an H11 bulb is commonly required.
Conclusion
Replacing a headlight bulb on your 2015 Nissan Altima is simple and quick. You save money by doing it yourself. Just follow the steps carefully to avoid mistakes. Regular checks keep your headlights bright and safe. A working headlight helps you see clearly at night.
It also makes your car visible to others. Take your time and use the right tools. Soon, you will feel more confident handling small car repairs. Keep your Altima’s lights shining bright and drive safely.